This is a method to root Fairphone OS (with GMS) while keeping the ability to
- install OTA updates,
- run apps which usually don’t run on rooted devices,
- install and run apps which use Google’s SafetyNet to check devices for modifications.
None of this is my original work, I just put together bits and pieces of information, tested it on the FP2 and wrote it down.
Only the initial installation requires a PC, all subsequent updates can be done on-device. I will not explain every little detail so you should be familiar with tasks like using fastboot and TWRP.
Prerequisites
You have to start with an unmodified Fairphone OS. If you made any modifications (root, Xposed), undo them. A thorough way of doing this is to flash the latest manual update (this will not delete your apps and data). Also, uninstall apps like phh’s SuperUser or Xposed Installer.
Initial installation
- Download the latest TWRP image and flash it using
fastboot. This is the only step which requires a PC. - On your FP2:
- Download the latest Magisk installer zip.
- Reboot into TWRP and install the Magisk installer zip.
- Reboot into Android, download and install the latest Magisk Manager apk.
- Install FlashFire. You won’t need that right now, but it is required for performing OTA updates.
Root cloaking and SafetyNet
Magisk Manager allows hiding root from individual apps using its Magisk Hide feature. Also, Magisk doesn’t break SafetyNet! I tested several banking and healthcare apps (which didn’t work with other rooting and cloaking methods) and they all work well (tested with Magisk 14.0).
Performing an OTA update
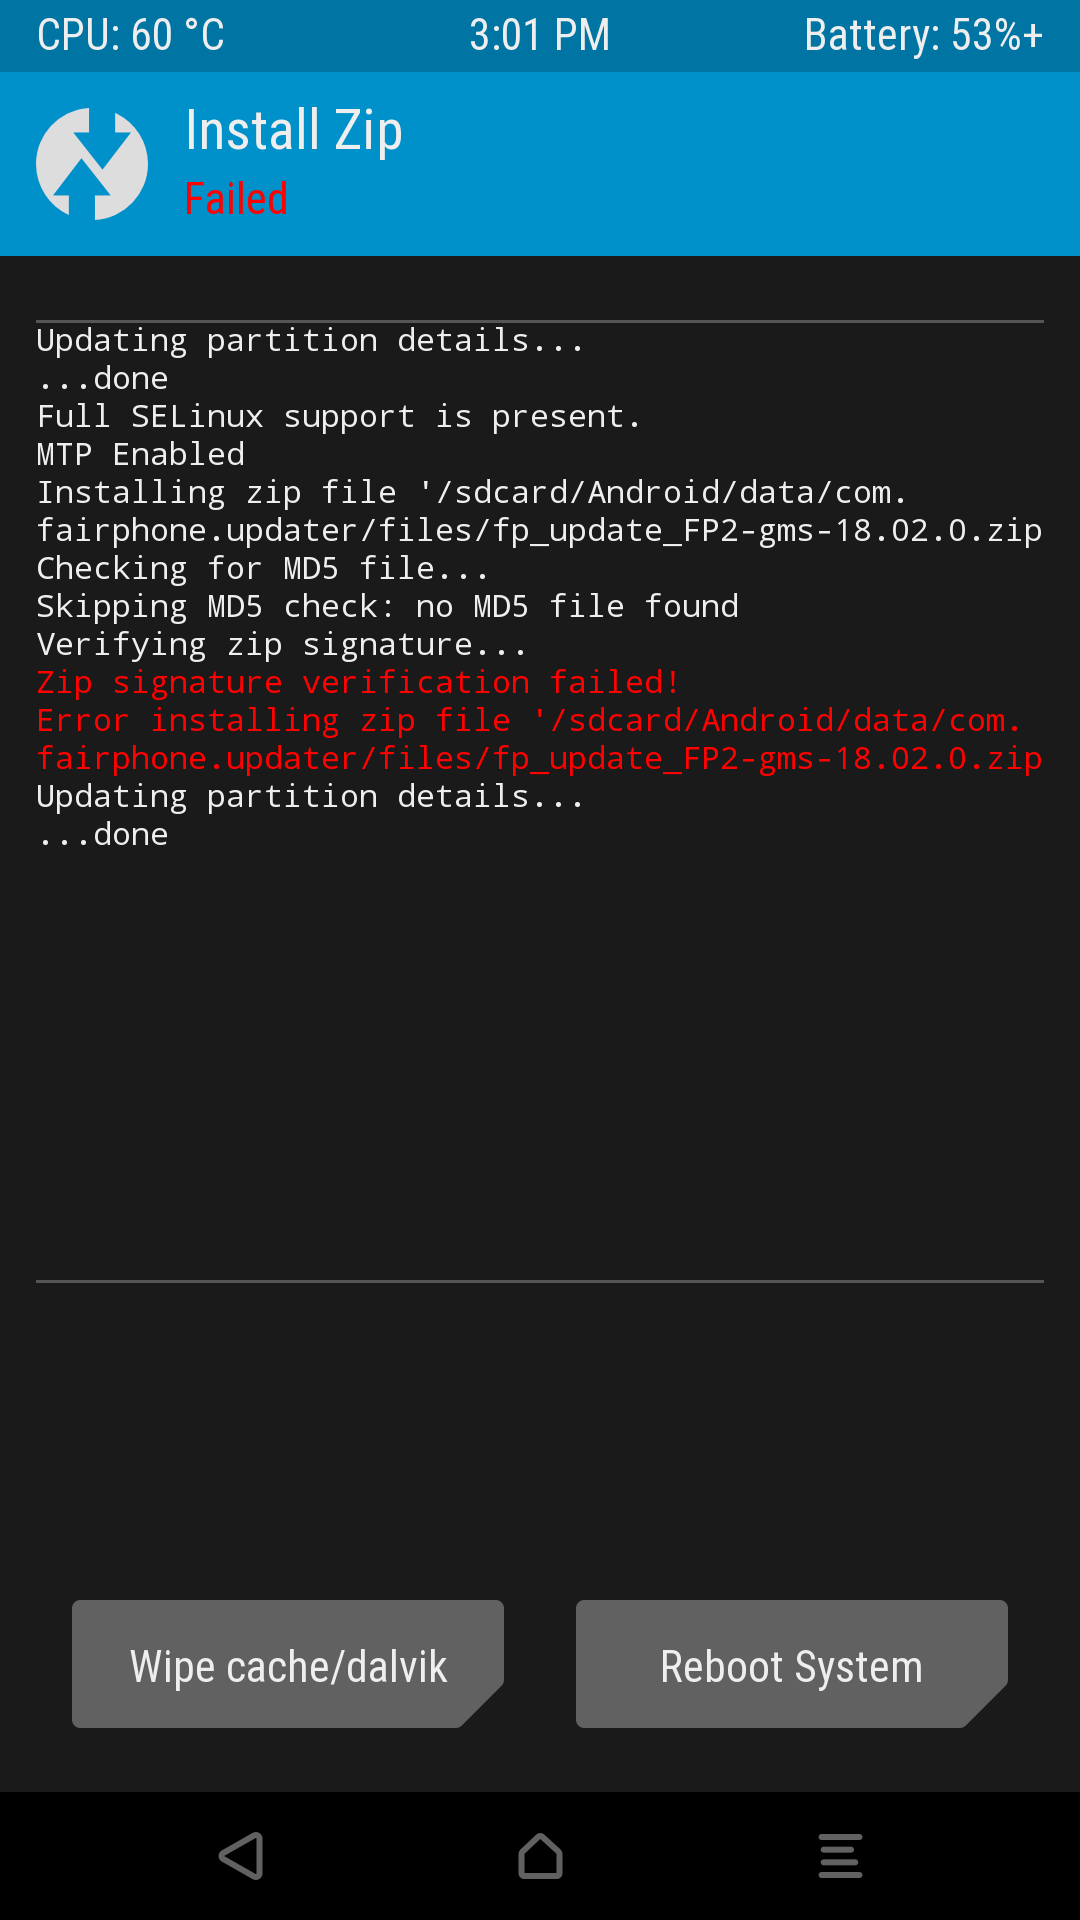
While Magisk is systemless (meaning it doesn’t modify the system partition), it does patch the boot image. OTA updates for the FP2 use a differential patching method not only for the system partition, but also for the boot image. This means we have to restore the original boot image before applying an OTA update. Magisk Manager allows you to do that, but there is another problem: You have to reinstall Magisk after each OTA update, but the OTA update overwrites TWRP with stock recovery. You would have to reinstall TWRP after each OTA update (using a PC). Fortunately, there is a neat workaround:
- When Fairphone Updater notifies you about an OTA update, download it, but don’t restart to install (this would fail).
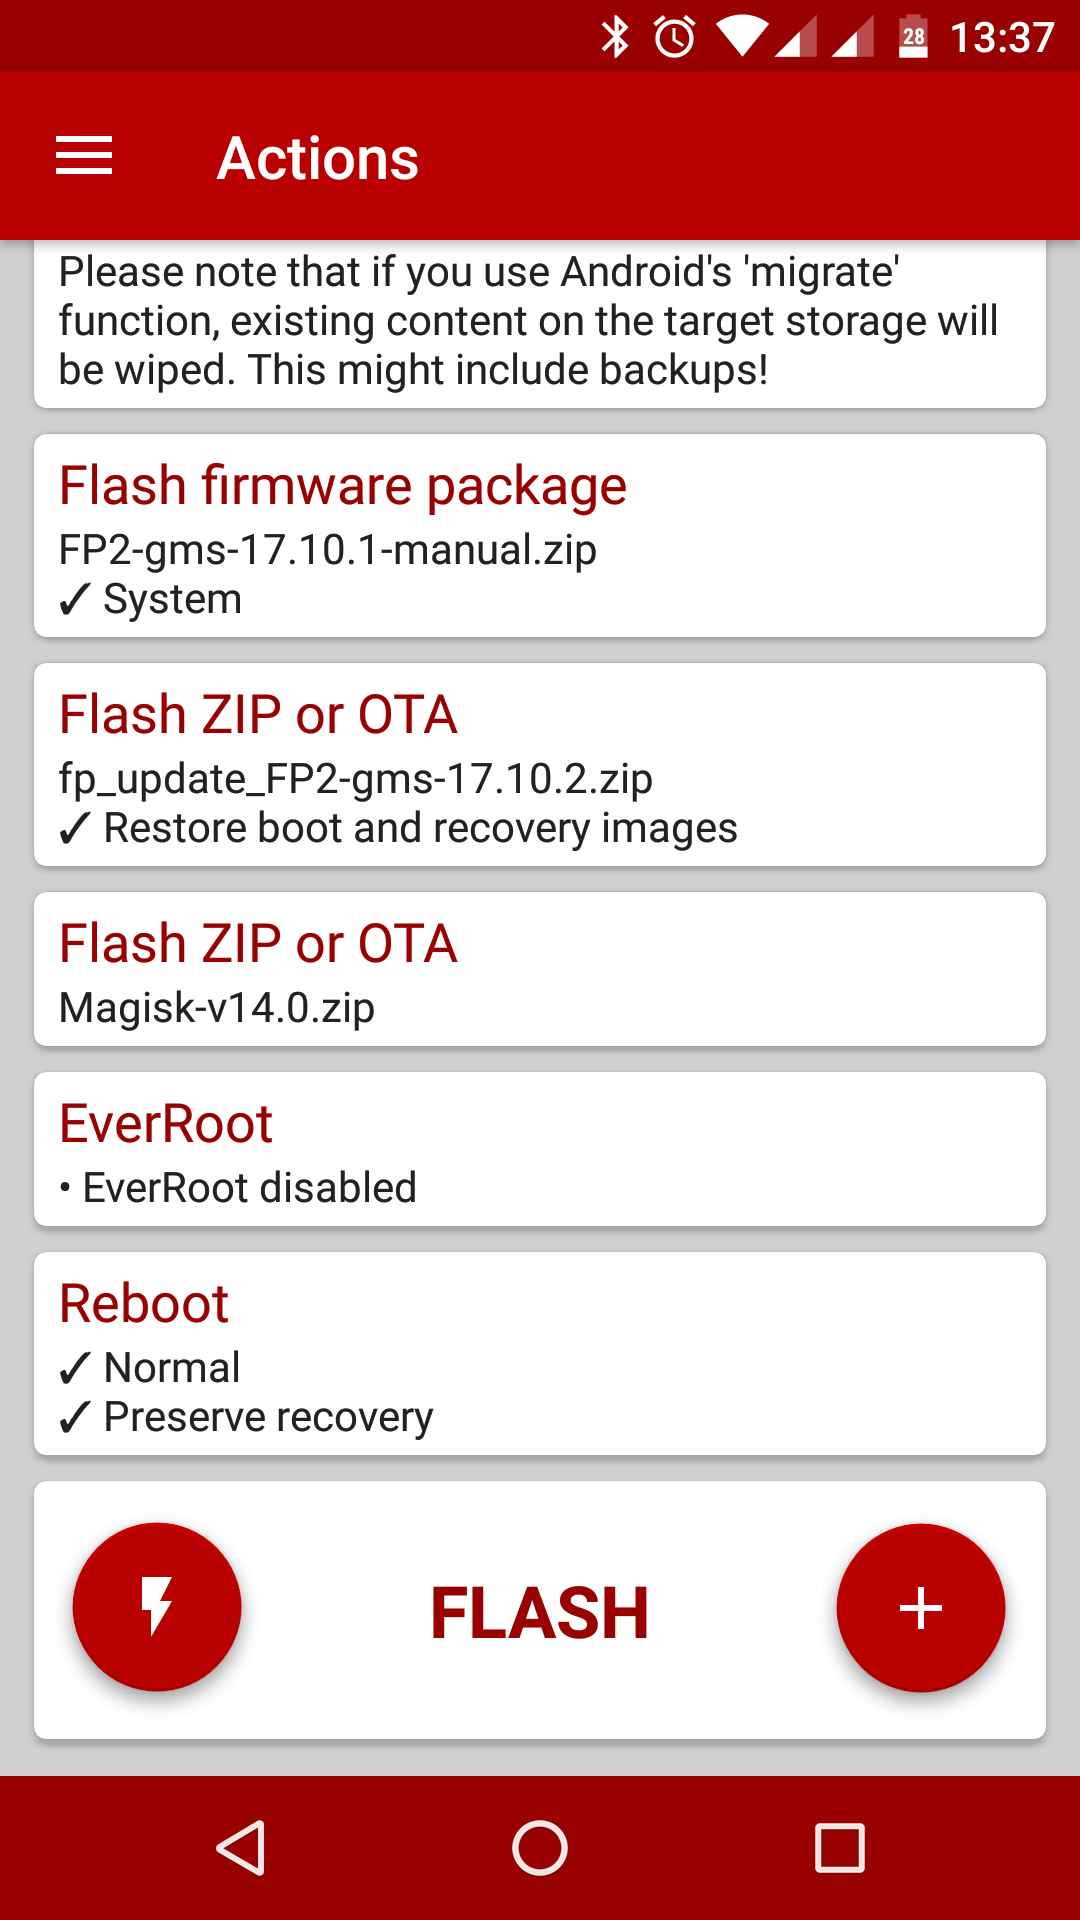
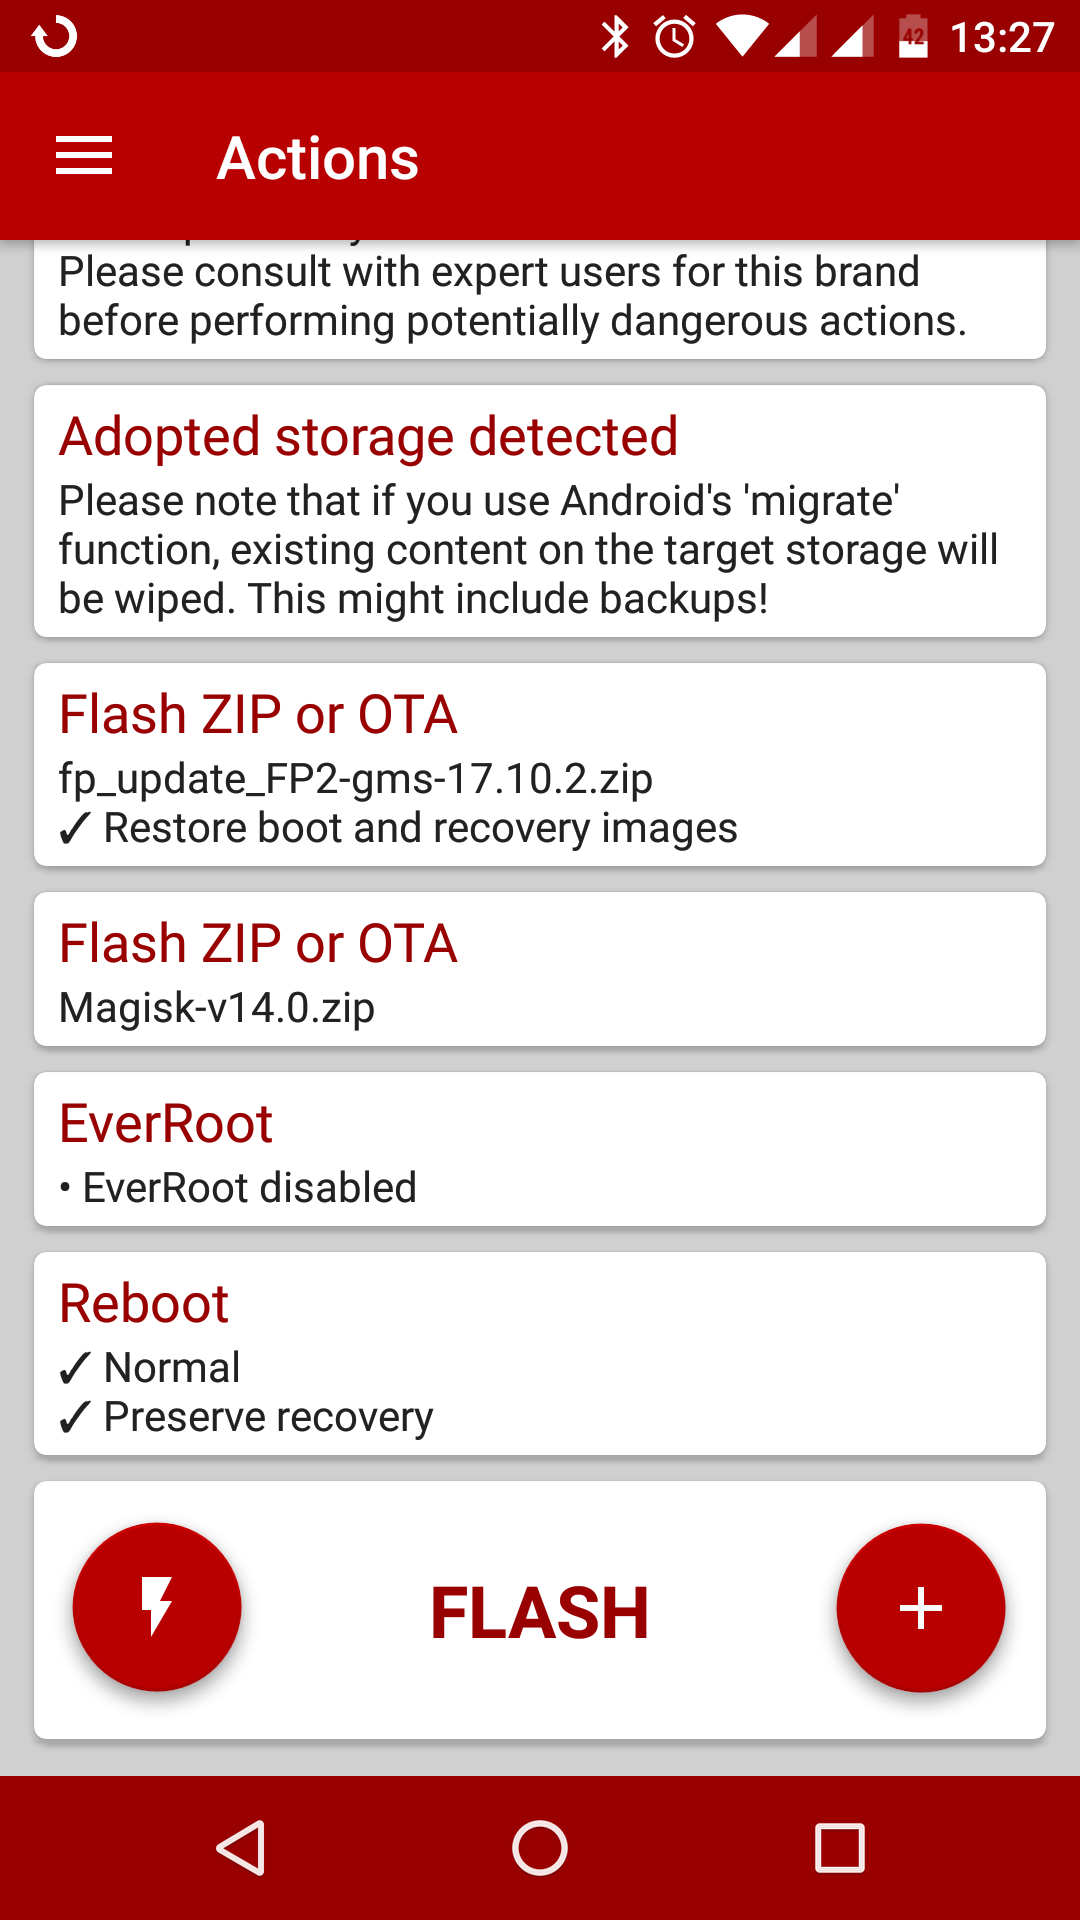
- Start FlashFire and:
- Tap +, then tap Flash ZIP or OTA and select the OTA update zip. You can find it in
.../Android/data/com.fairphone.updater/files/(either in Internal storage or on the SD card). Keep Restore boot and recovery images enabled. - Add the Magisk installer zip the same way (don’t enable Restore boot and recovery images).
- Disable EverRoot (important!).
- If it looks like this: Flash!
FlashFire will now backup TWRP, restore the stock boot image and recovery, run the OTA update, reinstall Magisk, restore TWRP and reboot. Done!
Optional: Systemless Xposed
You can download and install a systemless version of the Xposed Framework from within Magisk Manager (select the SDK 23 version and follow the instructions regarding where to get the modified Xposed Installer app).
Unfortunately this breaks SafetyNet and can make OTA updates a little bit more complicated, so you should only do this if you really need Xposed modules.
If you occasionally need to use apps requiring SafetyNet, you can temporarily disable Xposed Framework in Magisk Manager (requires a reboot).
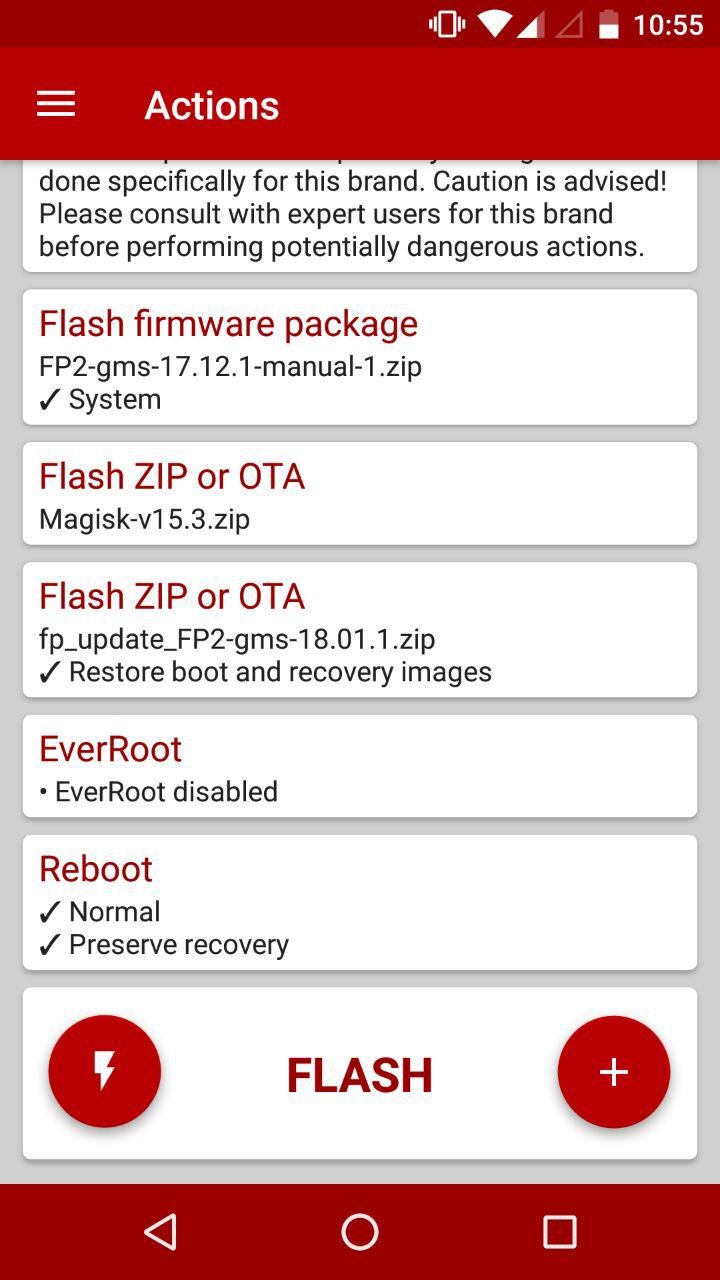
While the systemless Xposed Framework doesn’t modify the system partition, many Xposed modules do! This means we have to restore the stock system image before applying an OTA update. To do so, download the binary images zip corresponding with your current FPOS version and add it in FlashFire using the Flash firmware package option. Select System only. Then add the OTA update zip and Magisk installer zip (and disable EverRoot) as explained above. It should look like this: