Because of the fingerprint sensor issue, I’m still on Android 11 with my Fairphone. A new update for Android 11 on FP3 (8901.4.A.0025.0) seem to be available now at https://support.fairphone.com/hc/en-us/articles/360048050332 (although that seemingly was not announced on the forum as promised here).
However, if I understand the instructions for upgrading correctly, it is impossible to install this update without unlocking the bootloader first, which wipes the device, and afterwards, I can either live with the security problems of an unlocked bootloader or have the same problem on the next update. Is this correct?
This issue was not pointed out by @mikiballester in the thread linked above announcing the continuing Android 11 updates for FP3, he simply said:
If my understanding is indeed correct, I’ll probably switch to LineageOS, as that has the same problem, but with the upside that I can at least use new Android 13 features, and I’ll get security updates not only until Android 11 is EOL in a few months anyway.
I’m happy to let you know that we did a complete overhaul of our support articles for manual installation. This includes instructions for how to install an incremental update without a Factory Reset.
Take a look at the new article Installing Fairphone Manually. It’s fresh out of the oven so let me know if you have any feedback.
So great that the A11 updates can be installed via sideload!
In fact I just did the update from 023 to 025 without problems
But I think the install instructions are not 100% correct for the sideload way
It says “When the download it complete, move the file to your Desktop. This will be important later.”
for the sideload method, one has to unpack the downloaded ZIP and copy the file FP3-8901.4.A.0025.0-gms-b182be55-user-ota-from-8901.4.A.0023.0.zip from inside the ota-packages folder to the desktop I think (or can the “outer” ZIP be used for sideloading? I somewhat doubt that)
In step 8 of the install section it says “On your computer, navigate the command line to the Desktop”
I think one should stay inside the “platform-tools” folder of step 4, otherwise “adb” won’t be found (unless one has added that to the $PATH variable without the aid of the instructions)
the next step uses the full path anyway, so IMHO no need to change folders here
Step 9 is missing the command for macOS/Linux
It’s probably obvious, but as a last step one has to select “Reboot system now” via pressing the power button
And on a side note: my Linux system (openSUSE Leap 15.4) doesn’t have a “~/Desktop” folder, it has a German “~/Schreibtisch”.
It does have “~/Downloads” though. Not sure if that is more universal and could be used instead.
But kudos again for providing both ways and updating the instructions
Thanks for updating the articles, but sadly it doesn’t work for me.
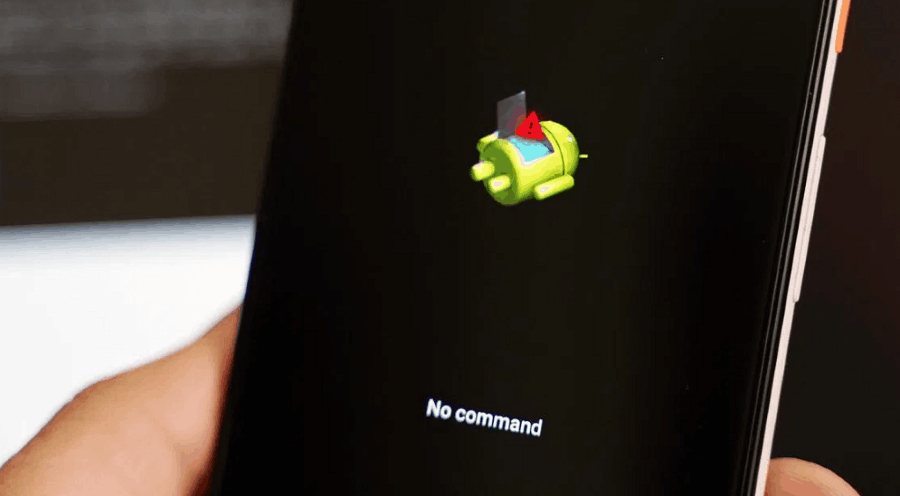
First the recovery mode didn’t work properly for me with a “No Command Given” screen which I fixed using the method in this video (using volume up and power button in while in recovery mode)
Now sideloading sadly doesn’t work with the instructions given. I tried using the the \ota-packages path too but it always says: “adb.exe: sideload requires an argument”.
I have confirmed that:
i downloaded the right packet (even thought i am still not sure which path i should use argument for adb)
USB debugging is enabled
adb works right (my device is listed)
I would love some help or clearer instructions!
edit:
I could get it to work using git bash and running “sideload_update.command” in “FP3-8901.4.A.0025.0-gms-b182be55-user-ota-from-8901.4.A.0023.0-manual-sideload”
The "sideload_update.bat didn’t work.
I had a look at “sideload_update.bat” and it wants to execute “bin-msys\git-bash.exe”. But that isn’t part of the unpacked ZIP file. I assume that must be added to the download file.
To my knowledge this lying robot with “No command” is by design on stock recovery (but not on TWRP or other custom recoveries), i.e. to be expected.
Which in turn means it probably should be mentioned in the instructions that one has to press Vol-Up plus Power in order to see the actual menu.
Assuming you had unpacked the downloaded ZIP file to your desktop, the full command should look something like
If you don’t want to type all this stuff, you could right-click the FP3-8901.4.A.0025.0-gms-b182be55-user-ota-from-8901.4.A.0023.0.zip file inside the ota-package folder with your mouse while holding the shift key. Then the context menu should have a “copy as path” entry (or some similar wording; I’m typing this on linux).
After that you can paste the full path to the command line.
Edit: I know you managed my now, I’m leaving this for others who might still need help
Thanks! This worked for me, although I had the same problems as the other posters (need to unzip the outer .zip file, the correct path is not given, some missing commands etc.). I assume you wanted to only upload the inner zip file contained under ota-packages/FP3-8901.4.A.0025.0-gms-b182be55-user-ota-from-8901.4.A.0023.0.zip, as the outer .zip file also contains some stuff unrelated to the instructions (the .bat file, the Bash file and, curiously, even some adb and fastboot binaries – I don’t think you are even allowed to redistribute those without giving attribution). Also, the commands for Linux and Mac OS are wrong, those use slashes instead of backslashes as path separators.
I tried to add all enhancements discussed here and some more to the installation guide to create a more complete set of instructions (a mod may convert this to a wiki post if they want so that other users can add enhancements):
Download and locate the file that you need to sideload:
The file is a .zip file located in the ota-packages directory (there may be one additional file named .gitkeep, you can ignore that. Otherwise, that folder should be empty)
Connect your Fairphone to your computer using a USB data cable.
Extract the .zip you downloaded in the previous step and move the unarchived folder to your desktop.
Open a Command Prompt (Windows) or a terminal (macOS). You’ll use this to send commands to your Fairphone. For starters, navigate to the platform tools folder.
On Windows, type the command
cd C:\Users\[YOUR USERNAME HERE]\Desktop\platform-tools_r34.0.4-windows\platform-tools
and press Enter .
On macOS/Linux, type the command
cd ~/Desktop/platform-tools_r34.0.4-windows/platform-tools
and press Enter .
Note that the exact name of the platform tools folder may be different from the example above.
Put your Fairphone in Recovery mode.
Power off your Fairphone.
Press and hold the Power and Volume up buttons at the same time.
When the phone vibrates, release both buttons and wait for a picture of an android with an opened belly and the text No command.
Press and hold the Power button, press the Volume Up button and immediately release both buttons. You should now see the main Recovery mode screen.
Use the Volume buttons to navigate to the option Apply update from ADB. Press the Power button to select the option.
Confirm that the phone is identified by your computer
Type adb devices and press Enter .
Note: If a command doesn’t work, try prefacing it with ./. For example: adb devices → ./adb devices.
If everything goes well, your phone’s serial number as well as the text sideload should appear on the computer screen.
Type adb sideload [FILE PATH], using the path and name of the OTA file downloaded from step Download the correct file.
Press Enter to confirm.
(Note that the filename may vary)
Wait until your phone is done installing the update (it should show the text Install from ADB completed with status 0. when done – this may take a few minutes)
Again using the Volume buttons, select Reboot system now and press Power to confirm. Your phone should now reboot into the updated OS version.
That’s my bad. It’s a pity this whole thread almost went past without me noticing it. Thanks for tagging me in your next reply.
I’ll review all the feedback and update the article.
“has some rough edges” What an understatement! How could support give such incomplete instructions?!
I’m so glad I found your post because I thought I had bricked my phone when I saw the dead robot and thought I would have to just flush my phone down the toilet.
Anyhow, that success message:
Install from ADB completed with status 0.
Btw, the status in my command prompt only ever reaches 94%, but once the phone showed selectable options again, I was pretty sure everything went well. Now I’m happily on 0025.
Any progress on this, @Yasen_Tomov? I expect there will be another update this month (updates every two months were promised here), and it would be nice to have correct instructions in the support article by then.
Hi all,
As my fingerprint on FP3 in combination with A13 is not working anymore and I desperately need to use ID Austria for some legal issues I finally decided that it is time to revert to A11.
I need help on this, I didn’t update my FP3 since august last year because of the upgrade to Android 13. I don’t want Android 13 on my phone because it work very well with Android 11 and Android 13 seems to slow the phone, my wife did it and she feels like it was not a good idea.
But now, I see there are still security patch for Android 11 that I wasn’t aware because I tough I had no choice of upgrading to Android 13.
Is there a way to do this easily, to update my phone with the security patch without upgrading to Android 13 ?