Here’s some photos:
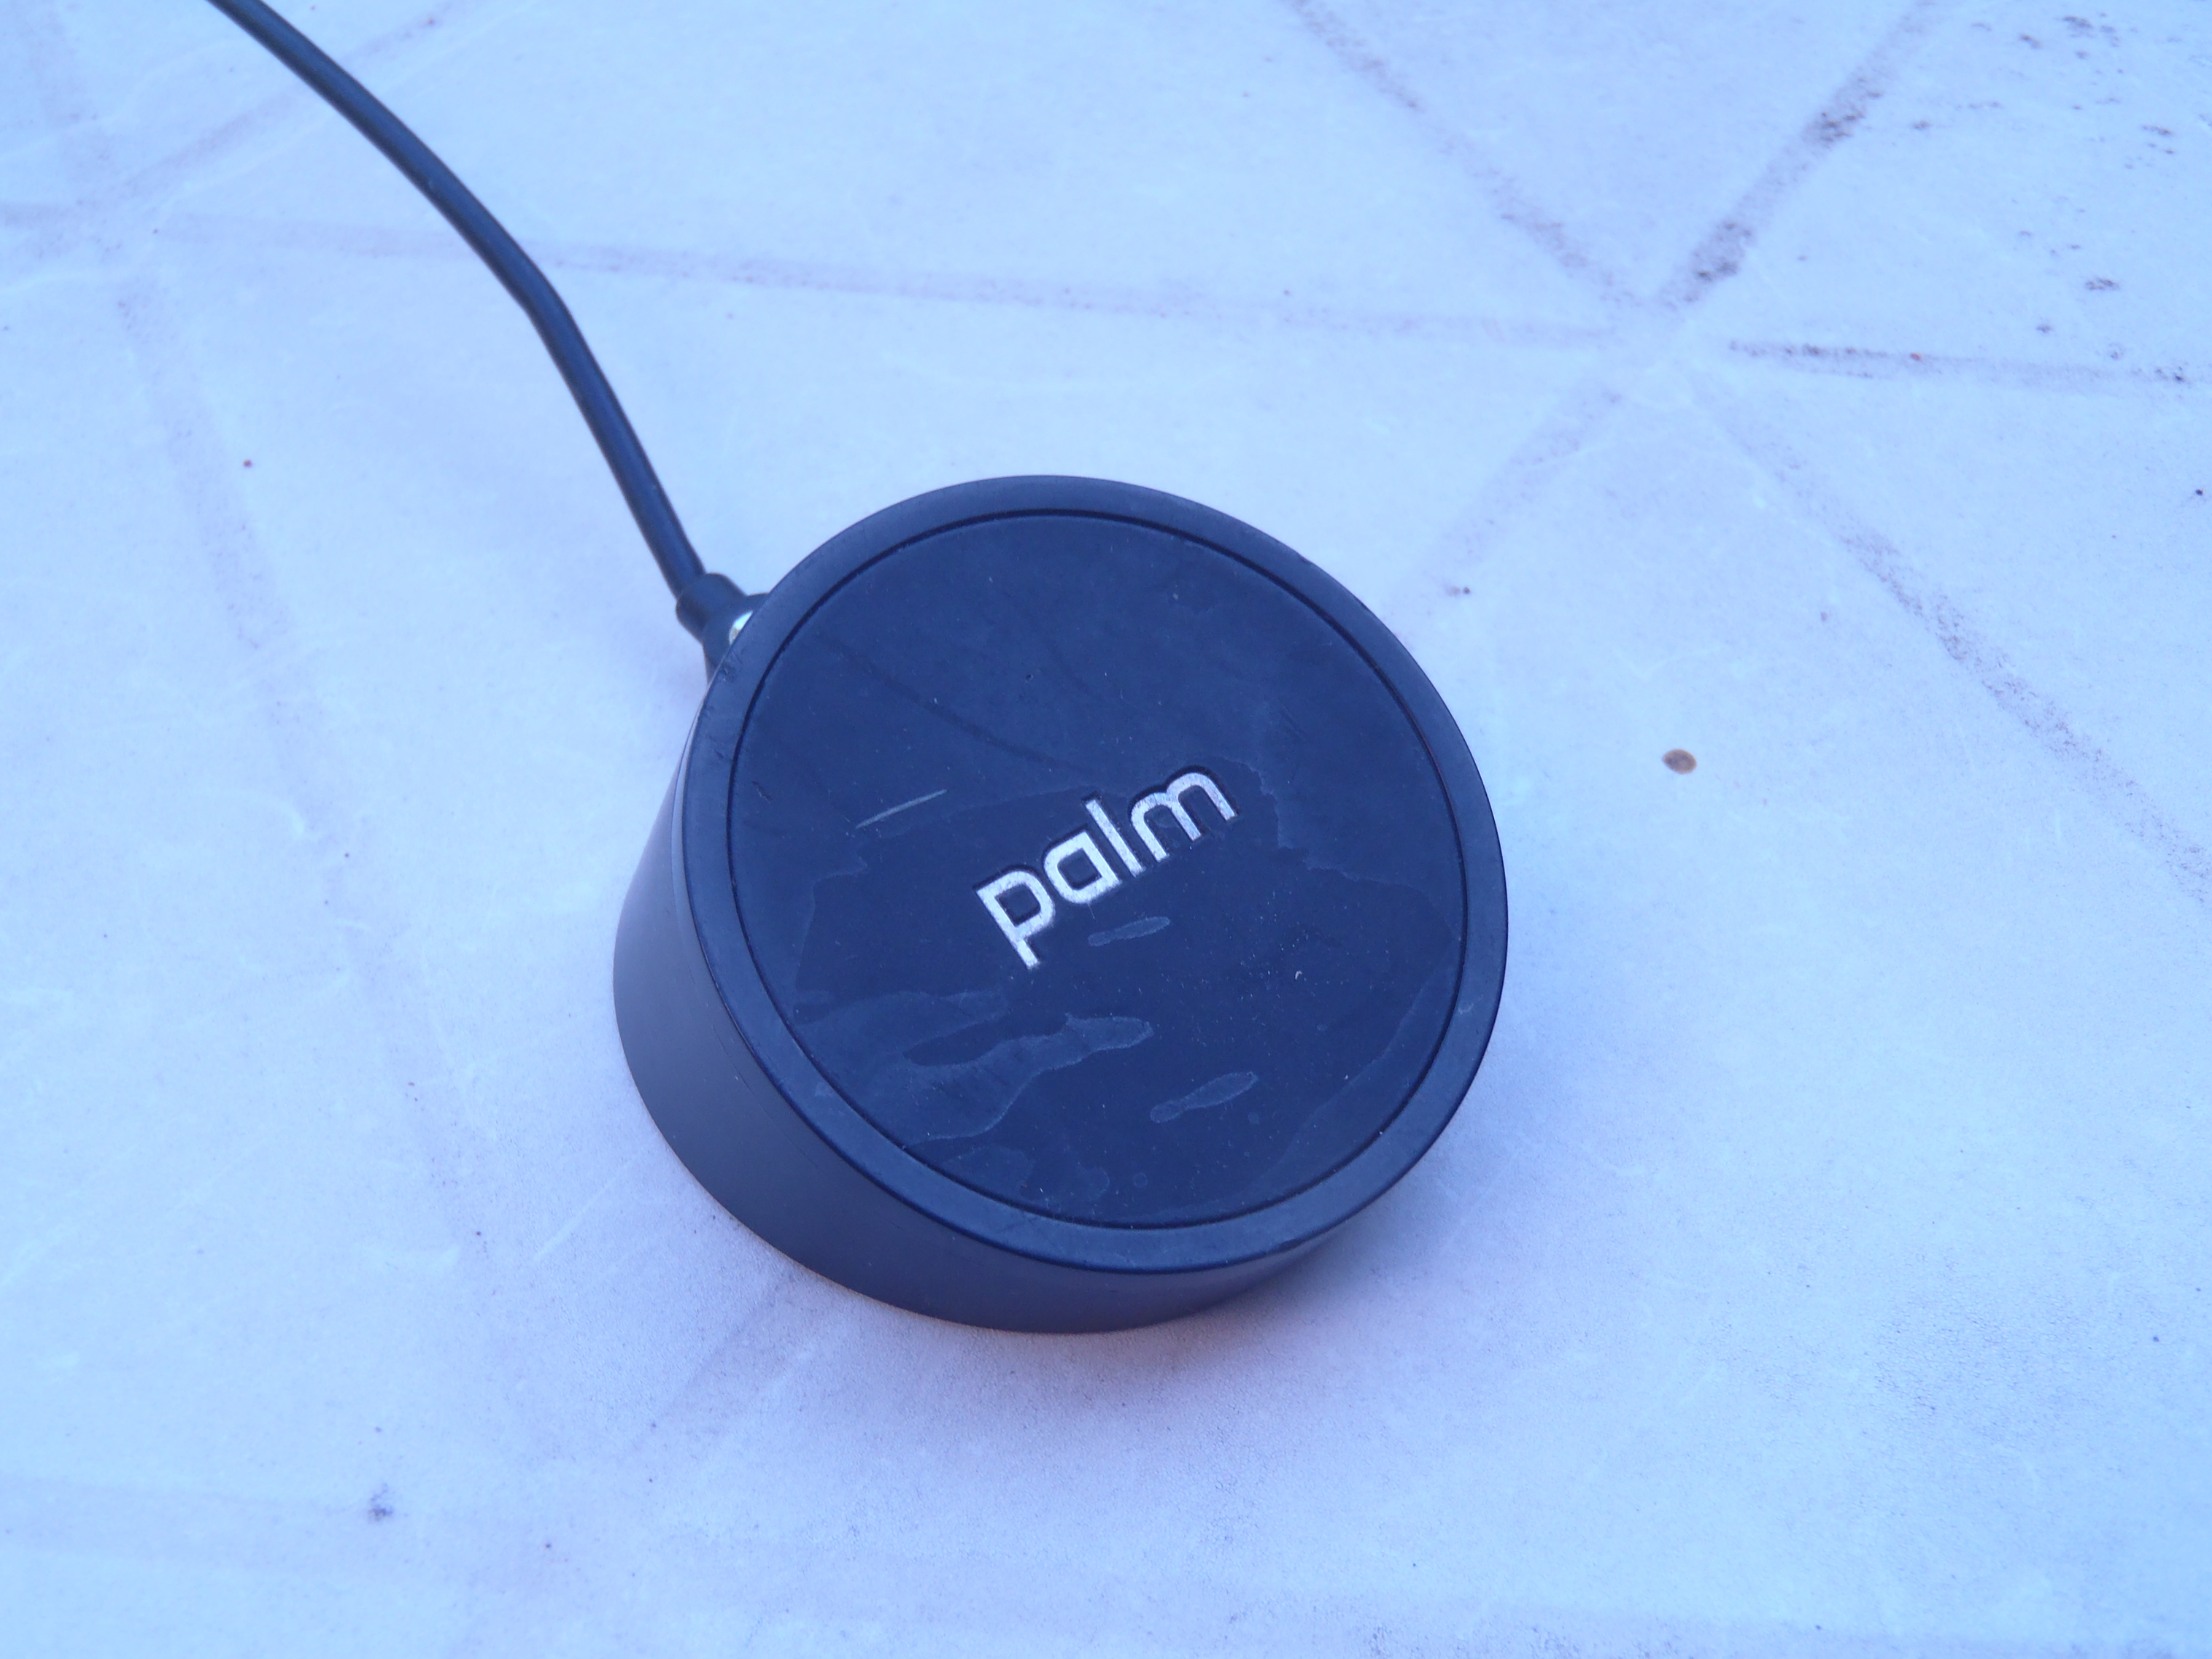
First the touchstone. I had to swap USB power supplies until I found one that worked. The Palm original one works fine. I suspect the PSU just needs to be dumb.
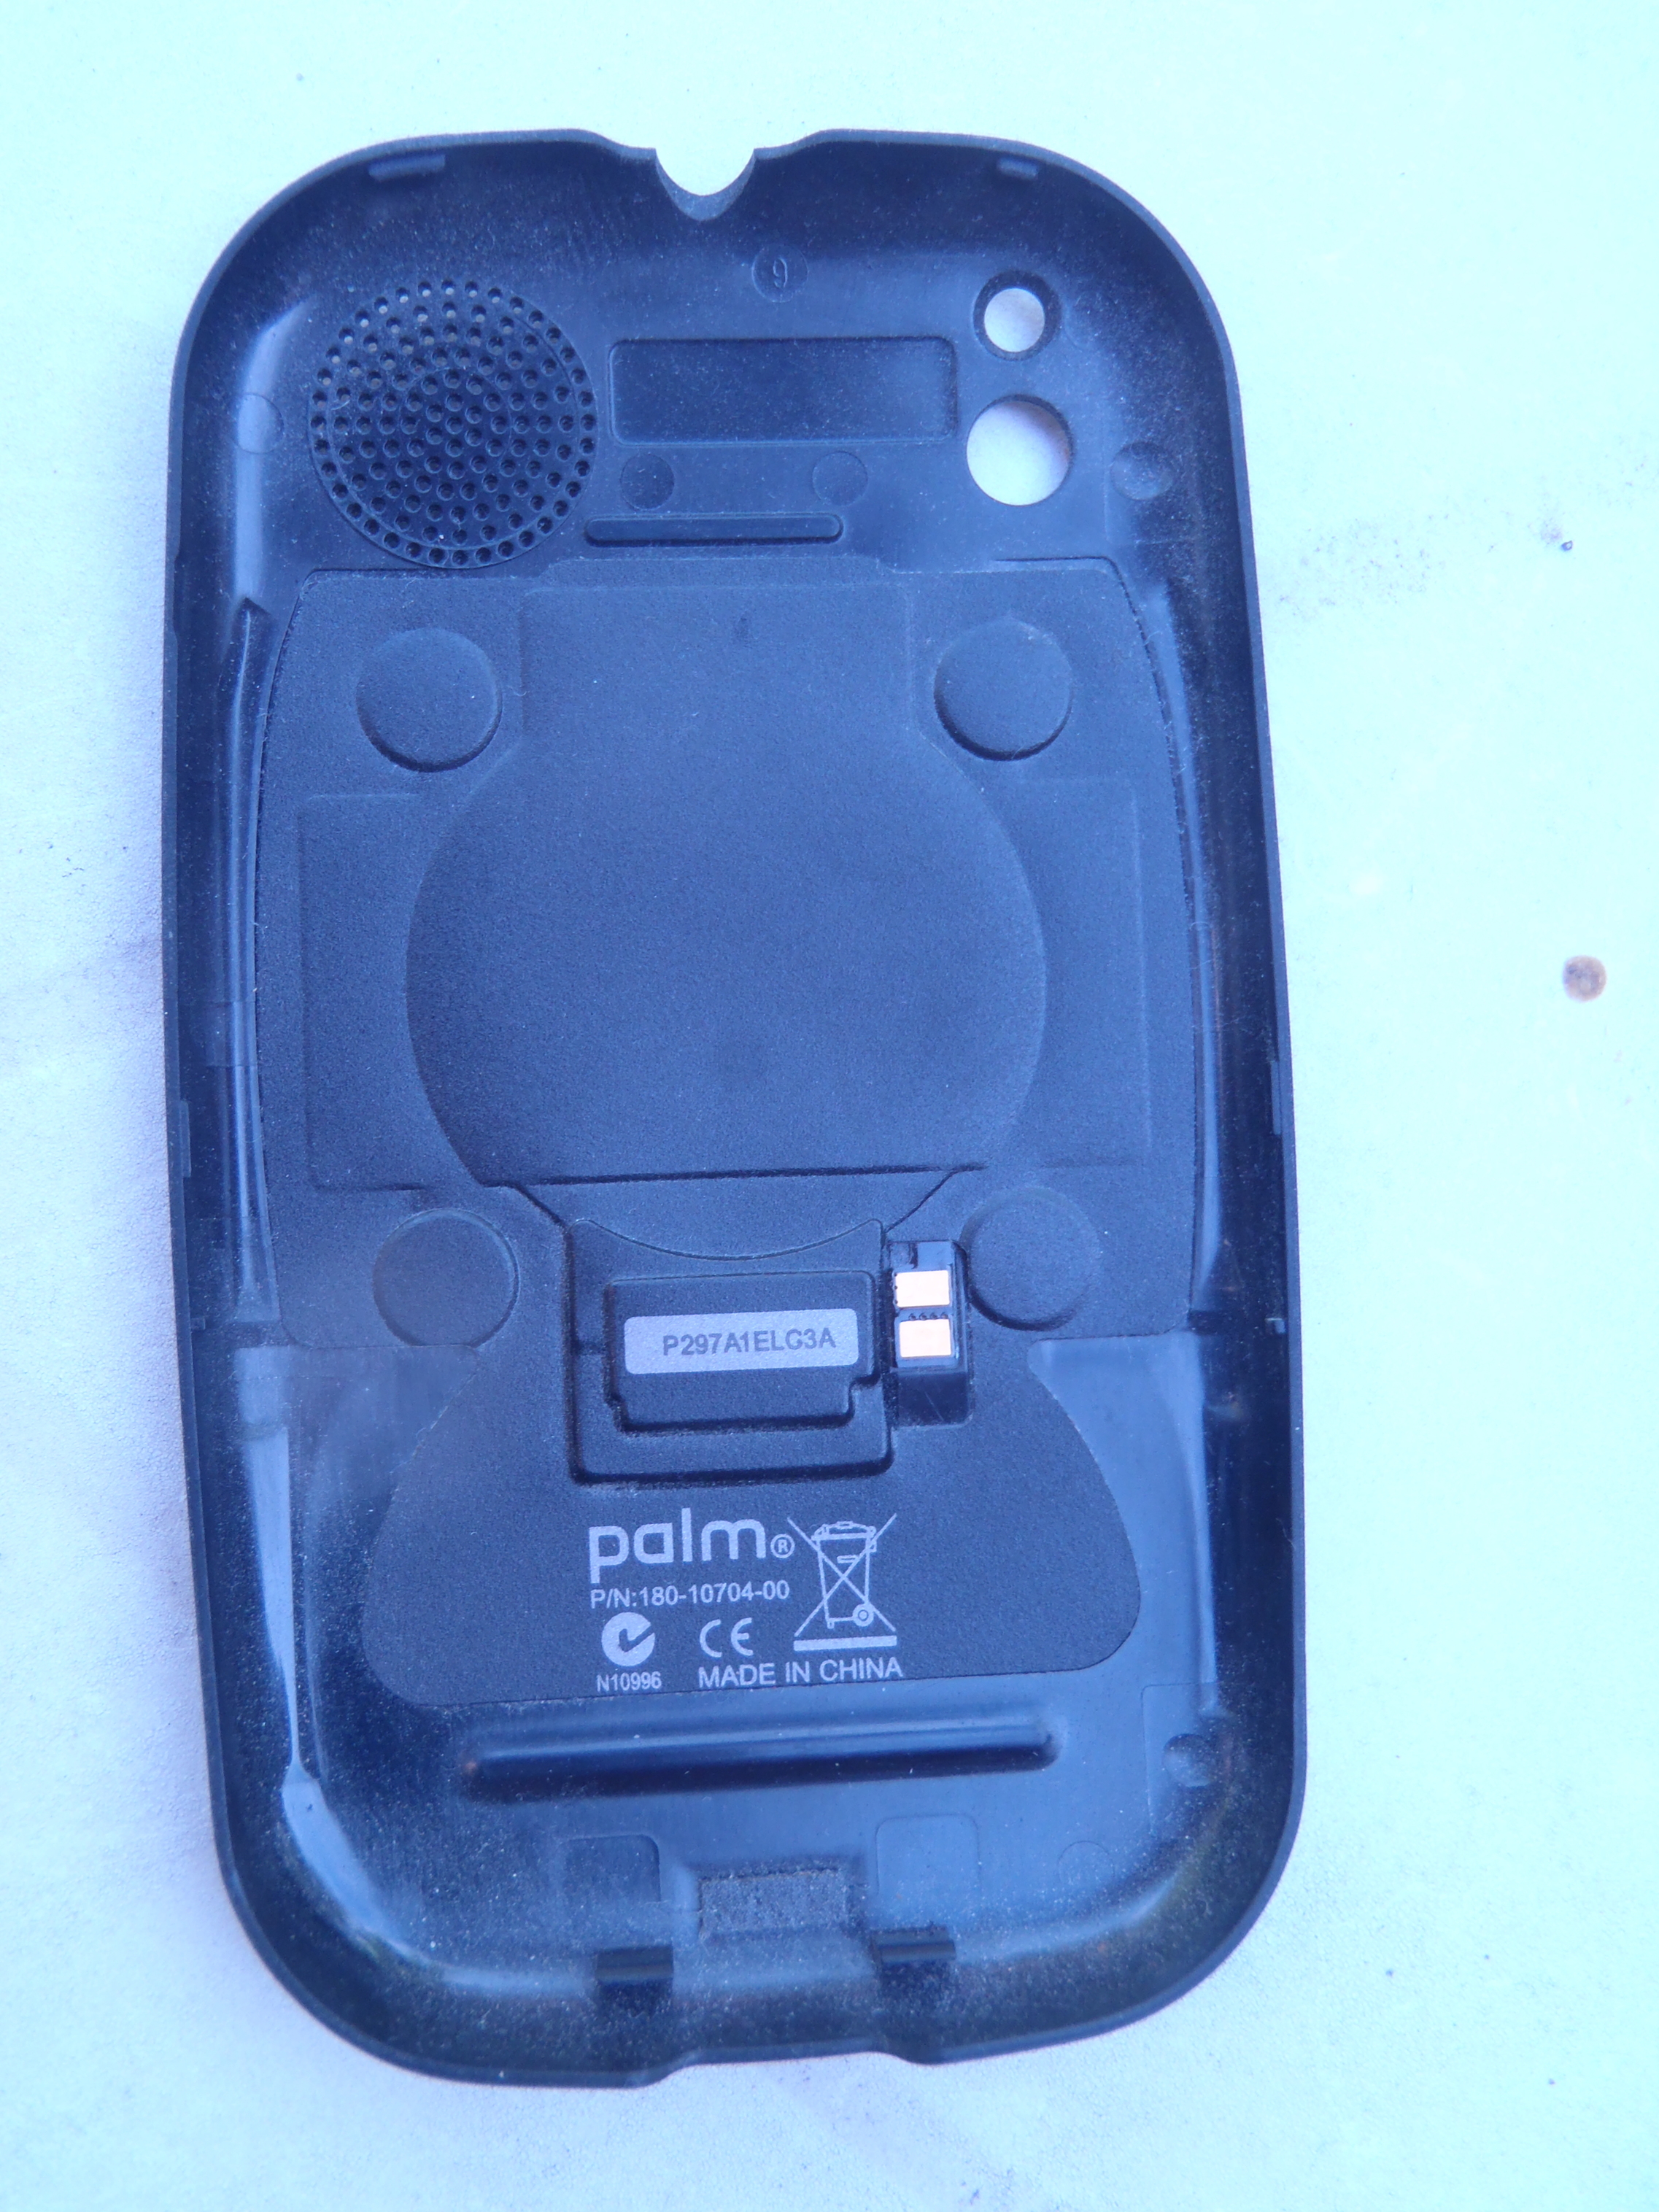
This is the palm pre back cover with the touchtone charging circuit. It peels off carefully.
The four round bumps are little metal discs that are magnetically attracted to magnets in the touchstone to align the two coils. The Palm Pre sat centrally on the touchstone.
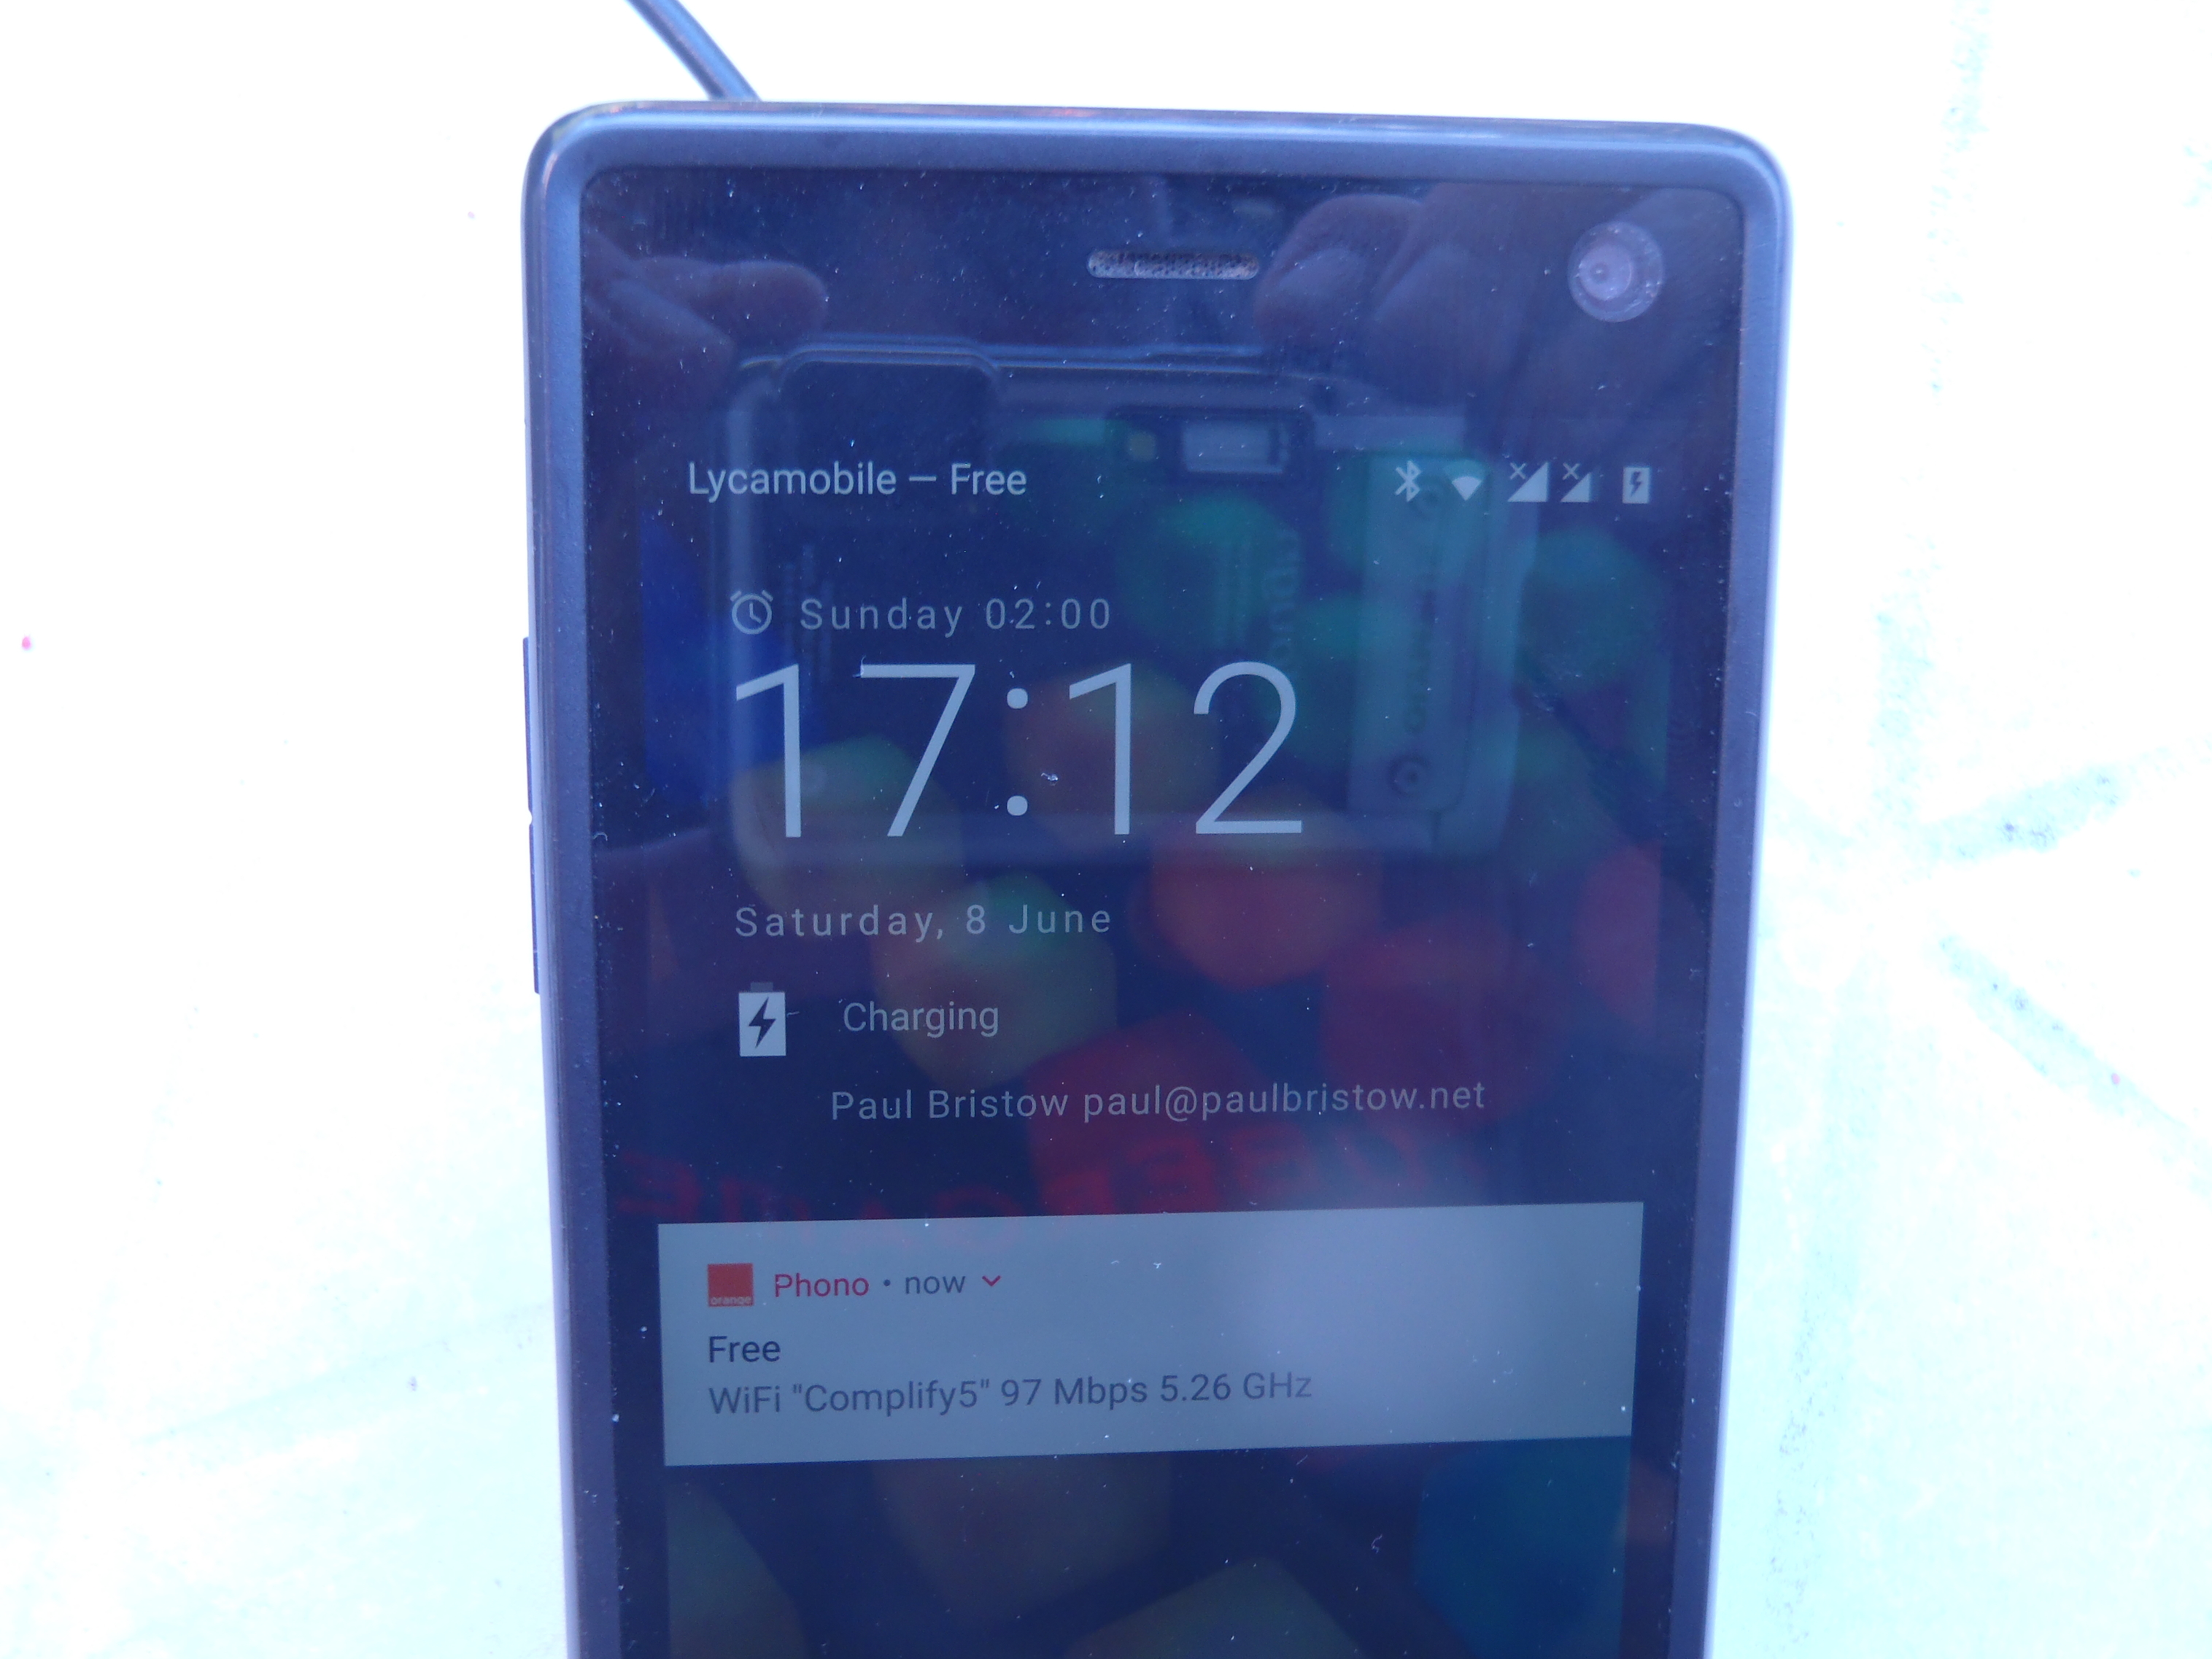
Here you see the FP2 charging on the touchstone.
Charging at full rate.
And having the charging LED on, which was nicely green this morning.
Here’s the quick and dirty hack to make it work. I put the coil over the battery with two fine wires attached to the coil circuit. Under the PVC tape I have two pieces of copper foil which I soldered the wires to. I insulated 3 of the 5 pogo pins leaving just pin 2 - charge, and pin 3 - ground. Which I carefully made a layered tape connection to. I had to add 4 layers of PVC tape to hold the connections together. Later I’ll add a custom PCB, but I wanted to see if it worked before I go to all that effort.
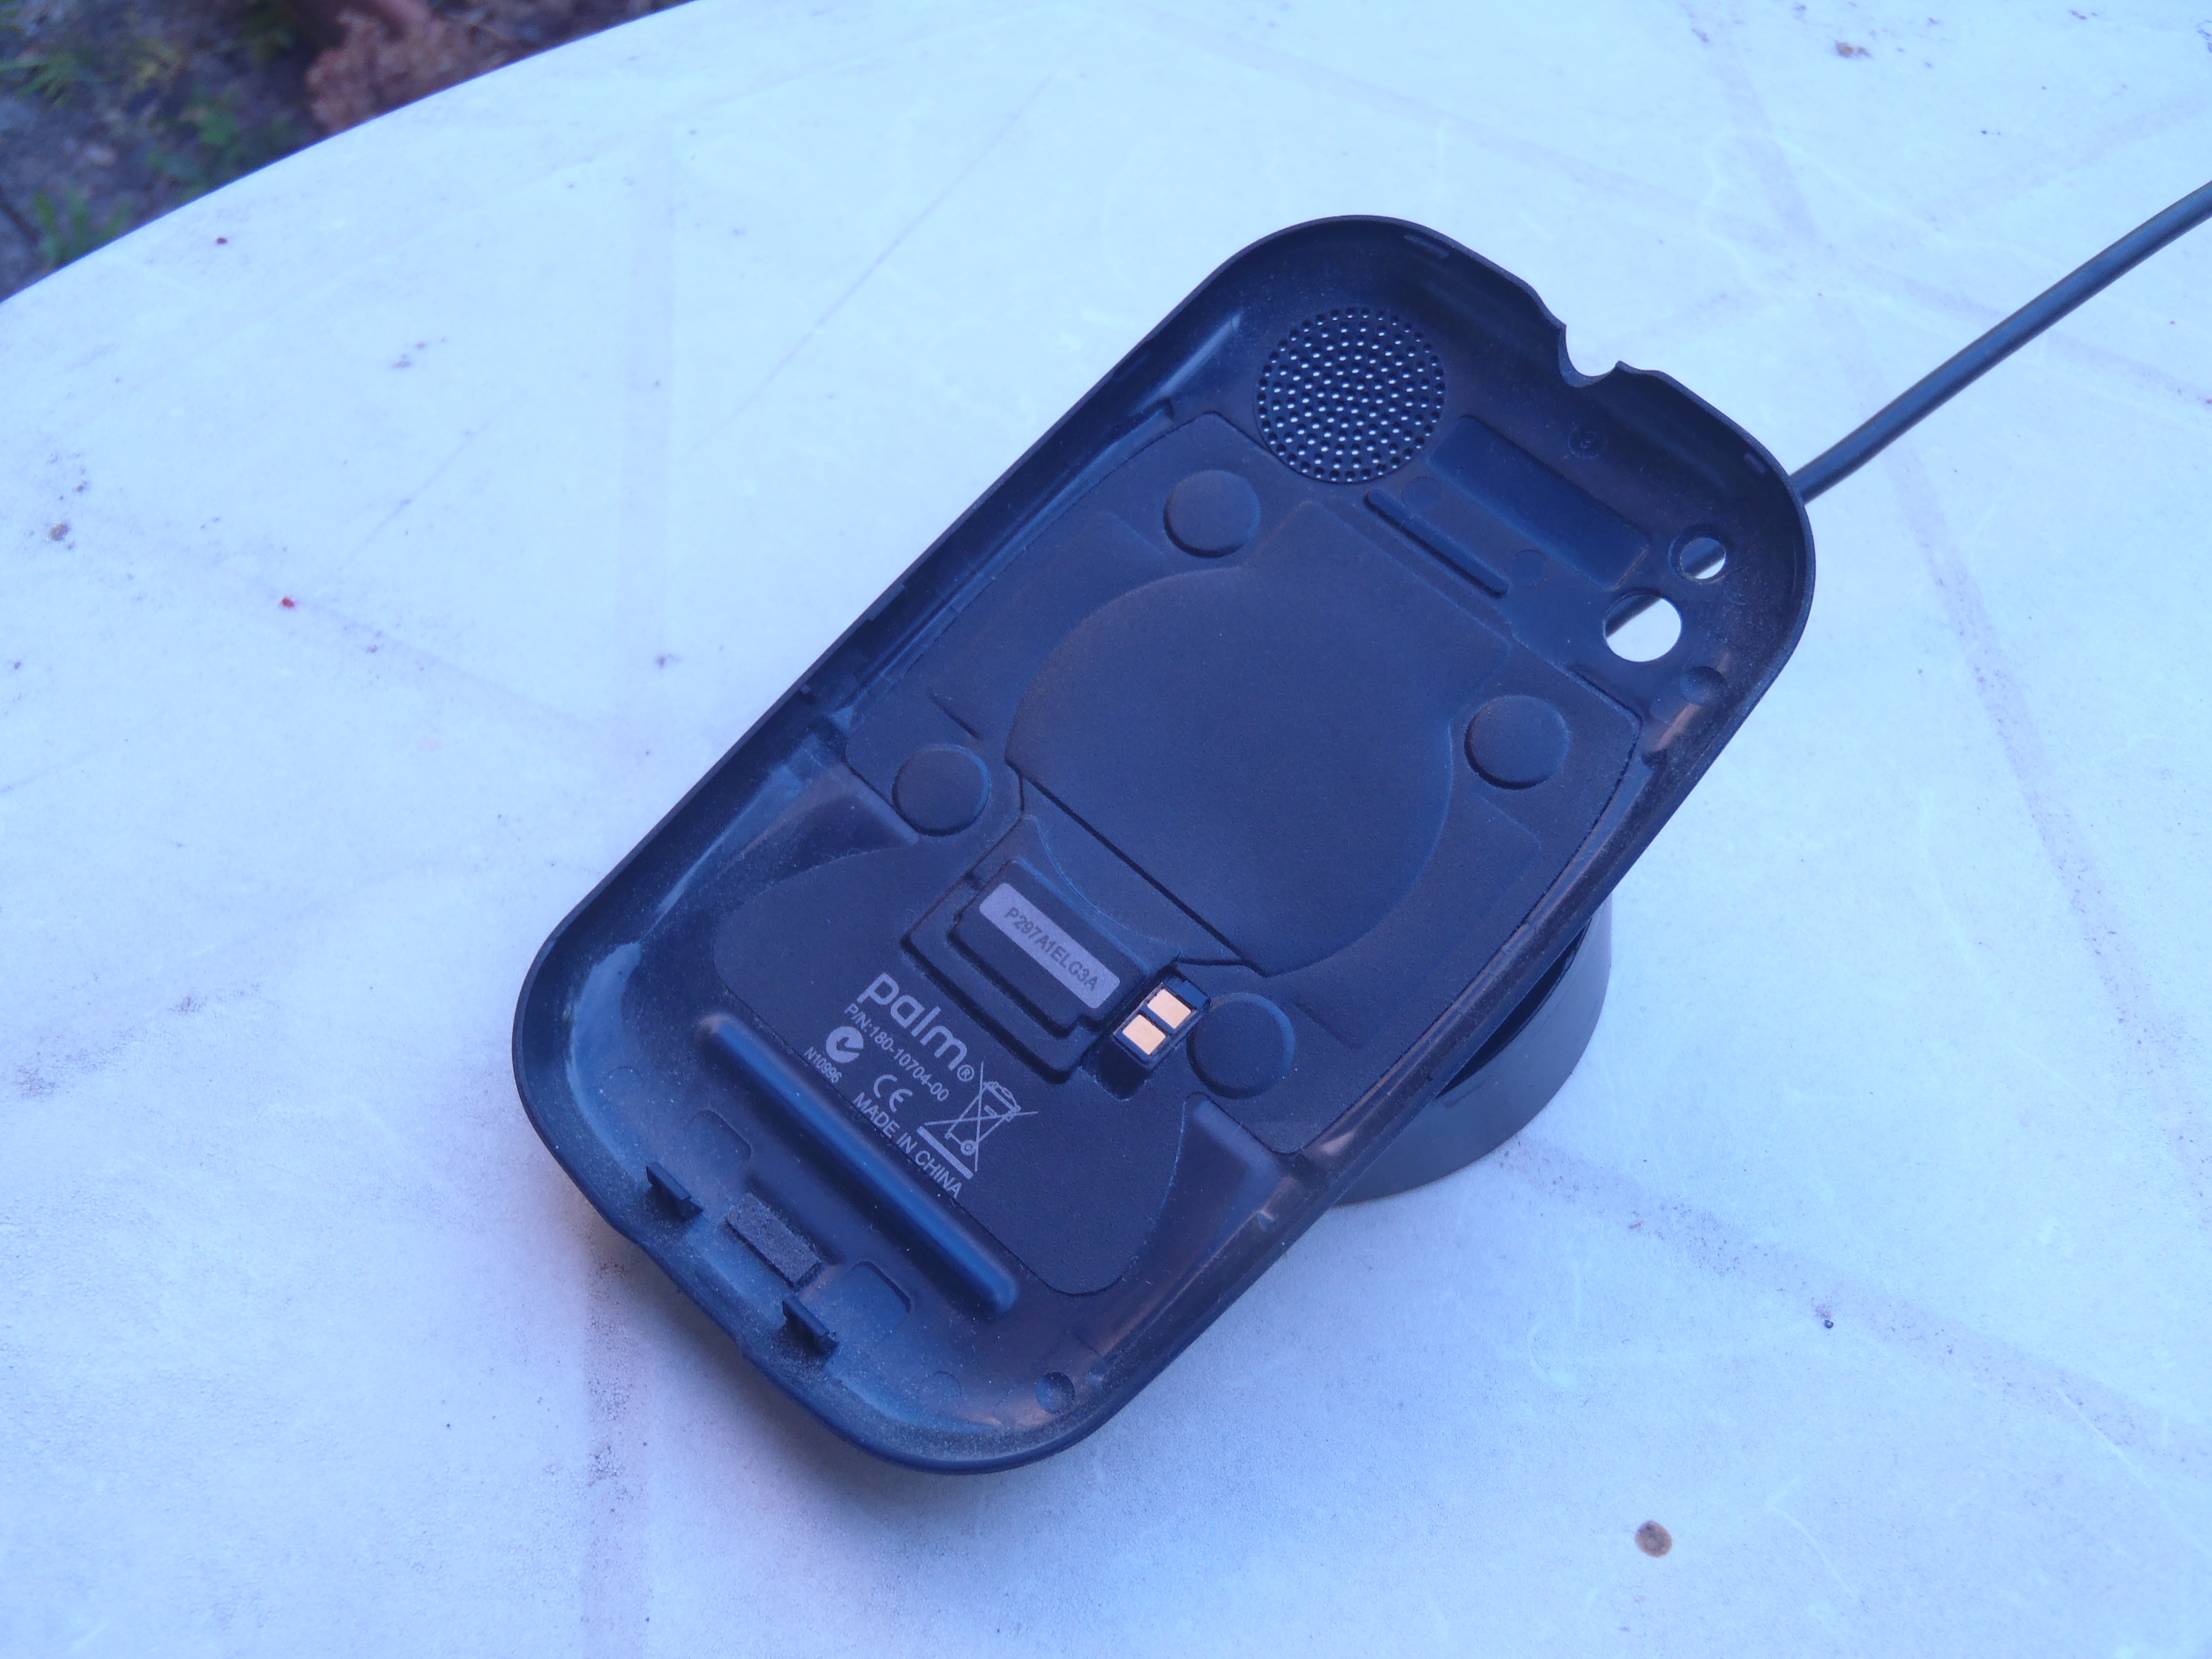
Finally, here’s the closeup of the coil in place, stuck to the inside of the back cover. There appears to be enough room in the case for all this without forcing or squeezing, as the Palm charging coil circuitry is very thin.
The magnets hold the phone in place, but it doesn’t seem quite as strong a hold as on the palm pre. I think the back cover is a little thicker and the phone a little heavier., but it does hold. The good thing is that once you feel the magnets holding it in place it is charging. The hold is strong enough to lift the touchstone.
I’m very happy to have wireless charging again, for an outlay of $0, and less than an hour of time. Let me know if you do the same thing!
Lastly, I just have to say that without this community documenting the connectors inside the phone and giving me the confidence to try, this wouldn’t have happened either, so thank you all.


 just have to cannibalize my working Pre+