Be careful with the connectors when replacing a module

:question:

Really? Did you check that? Are you just kidding because of the MP number or do they in fact use a Canon lens now? In the list of suppliers for the FP3 from August 2019 Canon is not listed; it’s O-Film and Holitech Technology for the cameras.
I guess they would advertise this, wouldn’t they?

1 Like

Unless they use the Canon logo without consent: that is printed on the module :wink:

There is a Canon logo printed on the camera module? Where?

At the place were this


was expected I saw this:
Now it could be I was seeing something that was not there. But to verify I would need to take the phone apart and that is something I will not do atm (too busy right now). Maybe someone else has noticed it too. If not I will report back after I have checked.

2 Likes

On my camera module it is:
CT302
38571

3 Likes

I made a few photos (pictured: FP3 with old camera module) of the area concerned so people might be able to grasp better what we are talking about here.


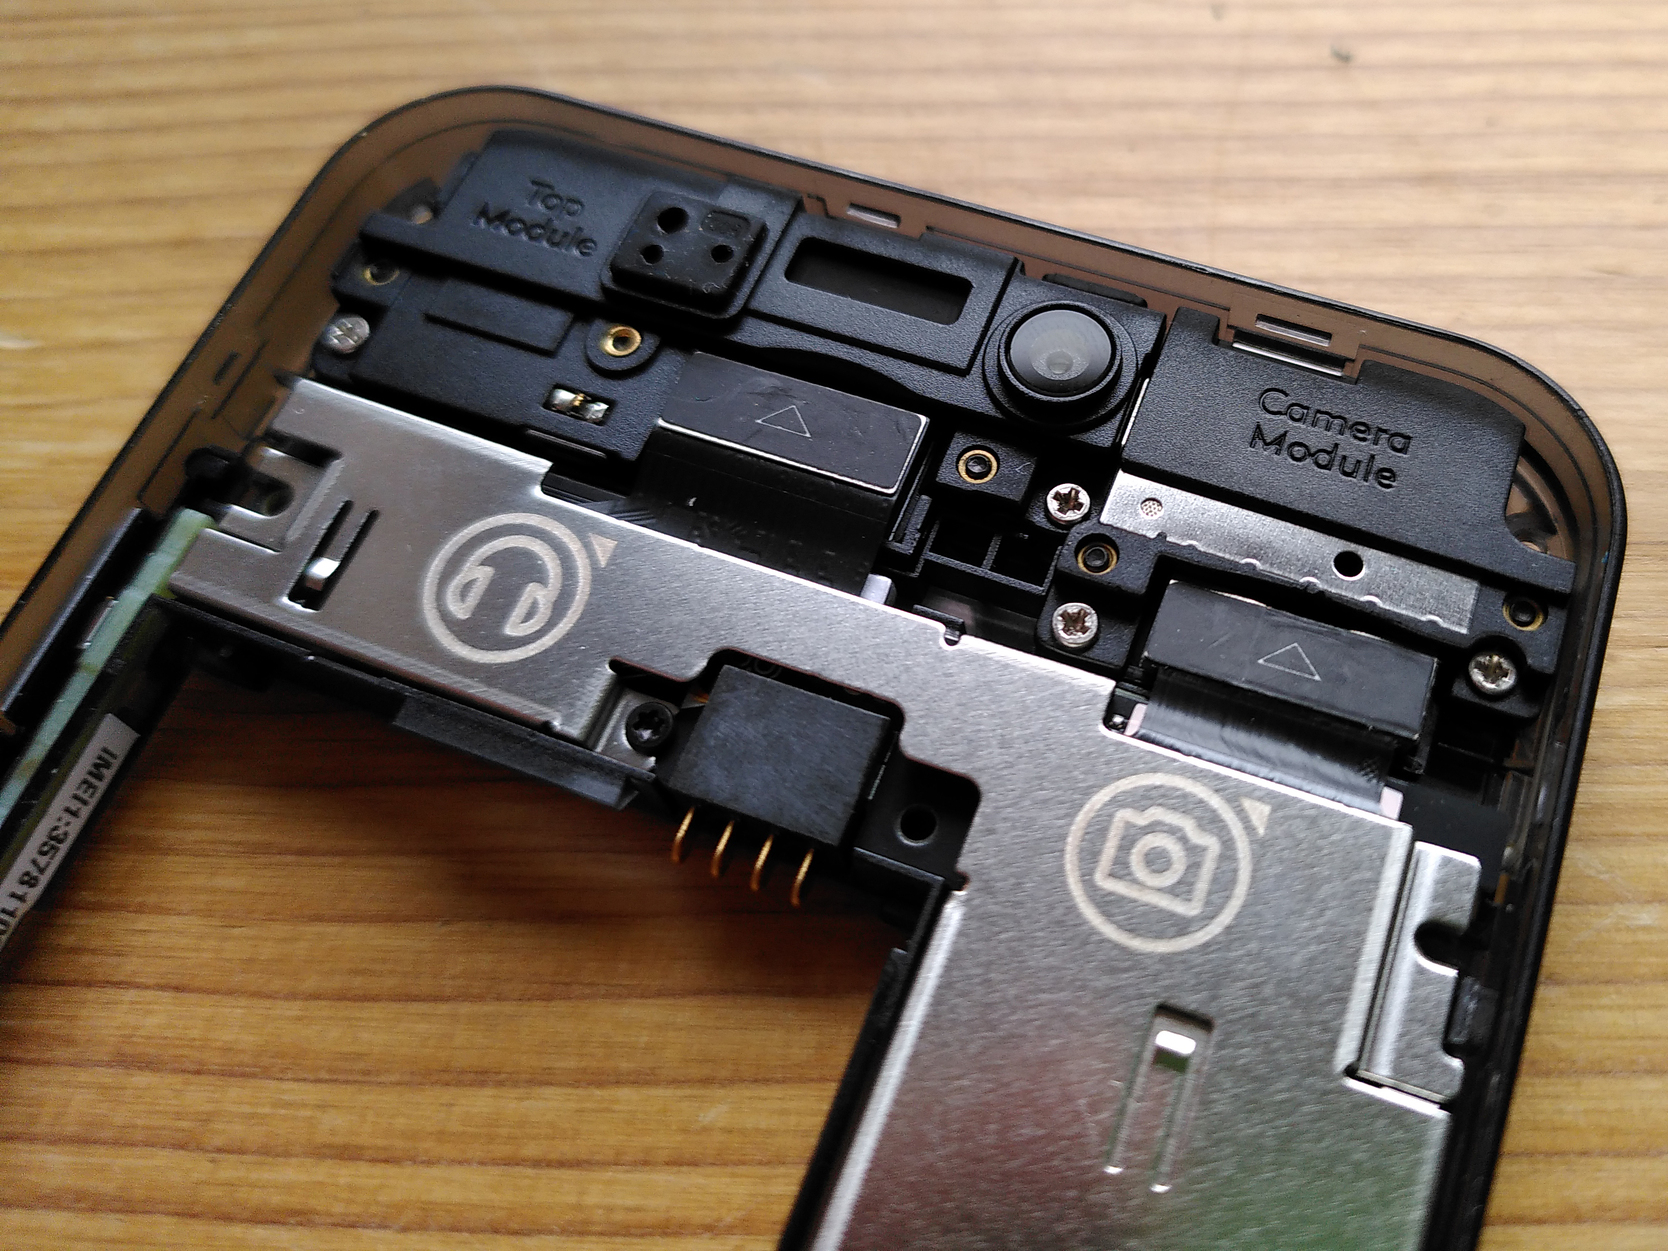
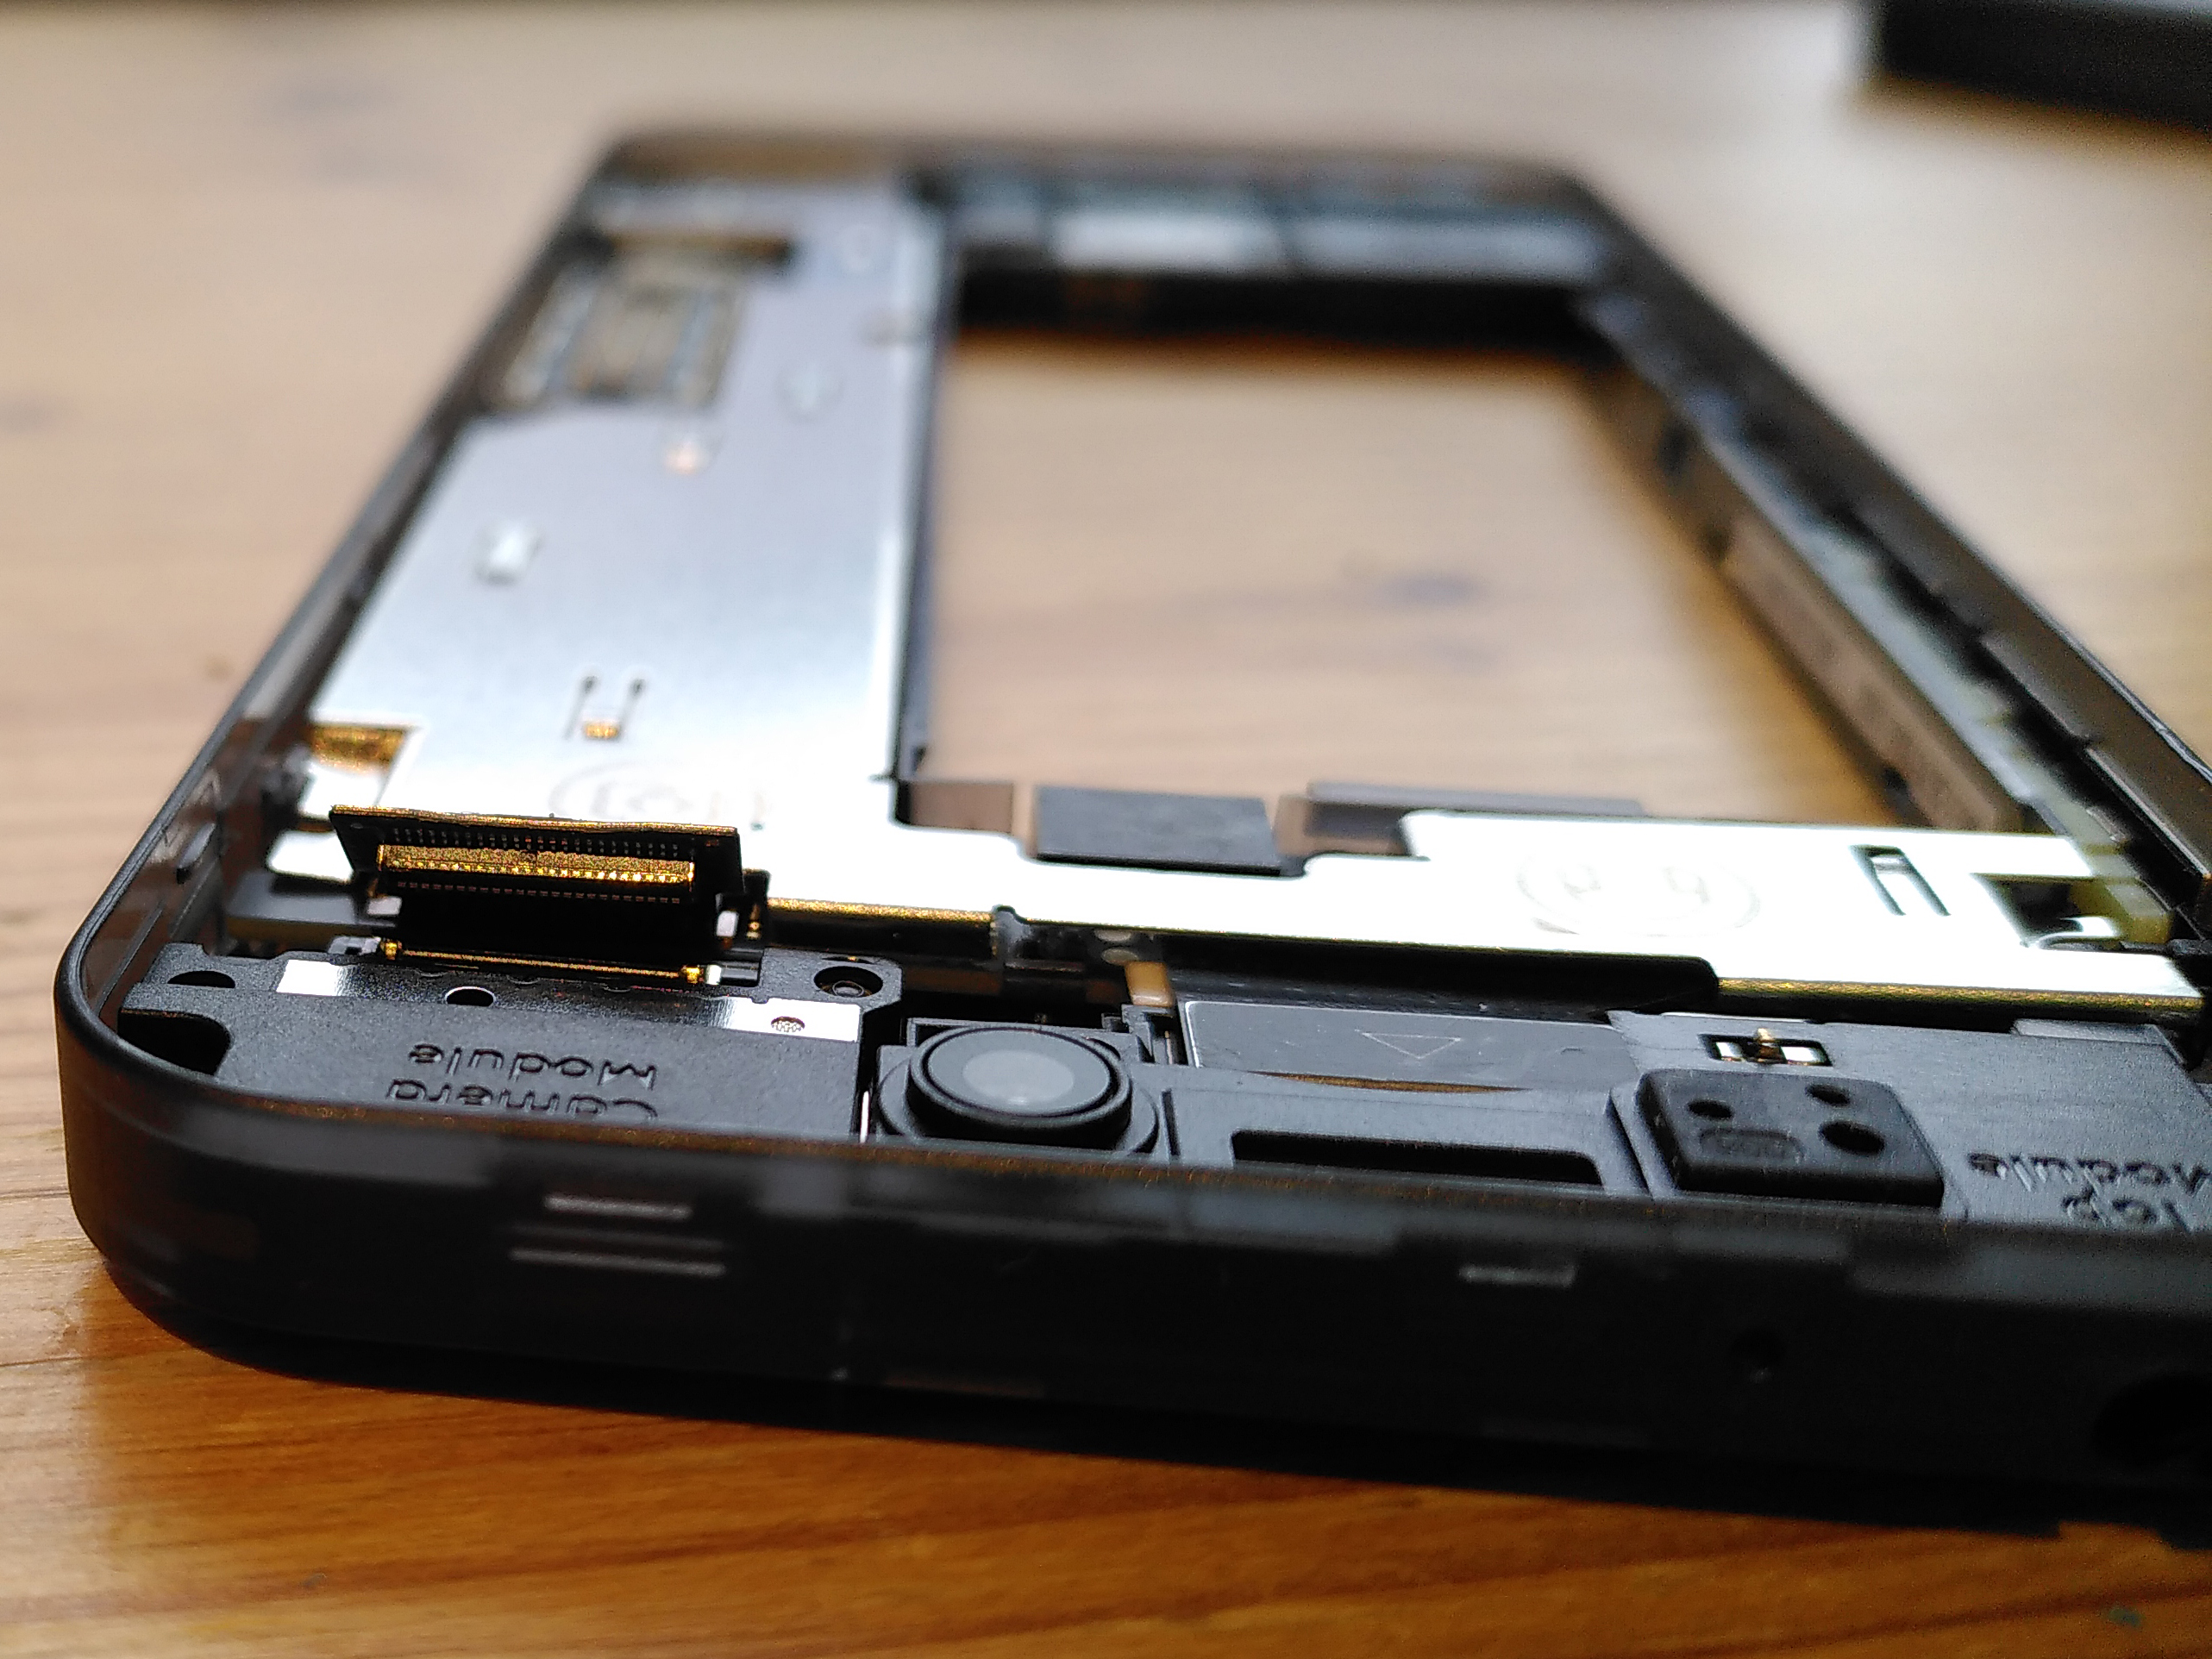
What got (and should not have gotten) disconnected here is probably the invisible opposite end of the connector that you can see in the first photo marked by a thin lined triangle. That opposite end should be on the “underside” of the metal that bears the camera icon (just where the tiny mini triangle to the top right of the camera icon is).

On an FP3+, I also found that clicking the connector back onto/into the camera module didn’t work on the first try. I then pushed the (loose) camera module towards the upper end of the case (core module) and the connector clicked into it then.

Eventually, a tip I think can be repeated every now and then: To just test if a module works or works again after you screwed open the FP3 or FP3+, it usually suffices to firmly press together display and core module – you must hear the plastic clips clicking again though. If the plastic clips are properly reconnected, you will usually be able to boot and fully use the FP3 even without the 13 screws back in. However, if the test is successful, don’t forget to still screw the 13 screws back in. :wink:

6 Likes

Hallo,
ich habe den Connector der Kamermodule mit dem Finger festgedrückt bevor ich beide Kamermodule in ihre Position geklickt habe. Das war mittels leichtem Druck sehr einfach machbar. Danach habe ich den Test mit nicht angeschraubten Display gemacht - alles lief problemlos.
Nun noch die vielen Schrauben reingedreht und happy :grinning:

Hello
I pressed the connector of the camera modules with my finger before i clicked both camera modules in their position. This was very easy to do with light pressure. After that i did the test with a non-screwed display - everything went smoothly.
Now the many screws screwed in and happy :grinning:

3 Likes

Also don’t forget this:

3 Likes

(New to the Community Forum… hi!)
I recently installed both the FP3+ Top Module and Camera Module in my FP3, and can confirm much of the advice given in this thread.

1st, Have the proper tools. The screwdriver supplied with the FP3 is a PITA. In anticipation of some more major work on some other equipment, I got an Pro Tech Toolkit from iFixIt, https://eustore.ifixit.com/products/pro-tech-toolkit/145307 (whilst recommended, this post is NOT an ad for iFixIt!). The iFixIt screwdriver works much much better than Fairphone’s, the magnetic pad helps to prevent loosing screws, the Opening Picks helped to remove the Display Module, the “Spudger” worked great for removing the connectors, and the Reverse Tweezers came in handy when trying to free a recalcitrant screw. I wore latex gloves. Also, ensure you have a clean level properly-illuminated workspace.

2nd, Read/Watch the instructions all the way through BEFORE proceeding.

3rd, Remember to power the Fairphone OFF!

4th, Be Careful! Do NOT “force” anything. GENTLY unscrew, GENTLY pry, GENTLY lift, etc. Here’s where using an Opening Pick to pry the Display Module free helped, it was much easier (more gentle) than trying to do it by hand as FairPhone suggests.

5th, For both the Top Module and Camera Module, make sure to remove the protective blue covering over the lens on the new (FP3+) units.

6th, I had no problems at all replacing the Top Module.

7th, Like others in this thread, I had problems with the Camera Module, including accidentally loosening the hidden end of the cable. Unlike others, I’ve not been able to get the new (FP3+) Camera Module to work (more on this below), BUT the old (FP3) Camera Module can be reinstalled and works fine. (Huh?)

8th, You don’t need to completely reassemble the FP3 to test it. Just make sure the Display Module is firmly reattached. I found it useful to screw it down with five screws, the most important one being the one above the SIM/SD slots next to the battery well (this seems to ensure the Display Module is making a proper connection to the main unit). The other four screws are those in the four corners (one screw per corner).

9th, the *#*#66#*#* diagnostics are incredibly useful. They confirmed the new Top Module is working, but that (for me) the new Camera Module (including the flash LED) is not working (but that the old Camera Module, when reinserted, is still working).

Despite having the Camera Module cable problem mentioned by others, which I fixed by using the iFixIt “Spudger” (as I now recall), my new FP3+ module simply doesn’t work. The before-mentioned …66… diagnostics report an error (the module (camera and LED) isn’t detected). I can reinstall the old FP3 module and it does work. I’ve done this twice now, and so am currently concluding I was sent a defective FP3+ Camera Module. (I will be contacting Fairphone Support about this.)

Not sure if this rambling helps anyone. My own top advice: Proper tools used gently on a level workspace!

cheers,
-blf-

EDIT 1: Fix an offering to Tpyos, teh deity of typos.

EDIT 2: Sorry, forgot to mention: 10th, Update to Android 10 (mandatory!).

EDIT 3: Clarify which five screws (when testing (8th)).

5 Likes

Welcome to our community! :slight_smile:

Is your FP3 running Android 10? That is necessary for the new modules to work.

Yes, I forgot to mention (I’ve edited my original comment), I am running Android 10.

Having said that, I would have thought the *#*#66#*#* diagnostics, even on Android 9, would at least detect the new FP3+ Camera Module, even if it couldn’t be “used” in any sense (excepting, perhaps, the flash LED might be usable (as a Torch/Flashlight), however it also isn’t working).

Thanks & cheers,
-blf-

EDIT: Clarify what I mean about the flash LED in the Camera Module.

2 Likes

Hello!

Good to read that others also had problems (and solved them) with the solving/connecting.

My new camera module takes finally pictures/videos, but it always clicks when opening the camera app. - Or even after opening it. It sounds mechanical - but it’s not. Surely not. I opened it again and checked. Could it be that it has to do with focusing? Does anyone has/had the same issue or an idea what else I could try?

Have FF3 with Android 10.
After changing the camera module the time had reset. Even if I do not see here a connection, but for the sake of completeness, hereby mentioned.

Since the tinkering had taken longer and the year is about to end, I already take the opportunity to cheerfully wish a Happy New Year!

I have absolutely no idea and would contactsupport in any case. That doesn’t seem normal and may be a factory defect with the module.

2 Likes

OK, I will do that. Thank you for the quick reply!

Stay healthy!

1 Like

Yesterday, after sitting two months in the drawer, I replaced the two camera modules with the + types.
Thank’s to all the hints and tips here :+1:and the ifixit manuals the change worked out very well. Not to say mint.
No troubles, no stress :wink: :upside_down_face:

4 Likes

Hallo Roel,
hast du das Problem gelöst? Mir ist heute das gleiche passiert.
LG

This topic was marked as solved with post #4, as can be seen in the first post :wink:

4 Likes

Hello Nina,

It has become a long post, but I (and several others) have fixed it with. So try and read back all the comments, there are several solutions.

5 Likes

Hello Roel,

thank you, I fixed it by lifting the cover oft he contact.

Have a nice evening

Nina

3 Likes

This topic was automatically closed 90 days after the last reply. New replies are no longer allowed.